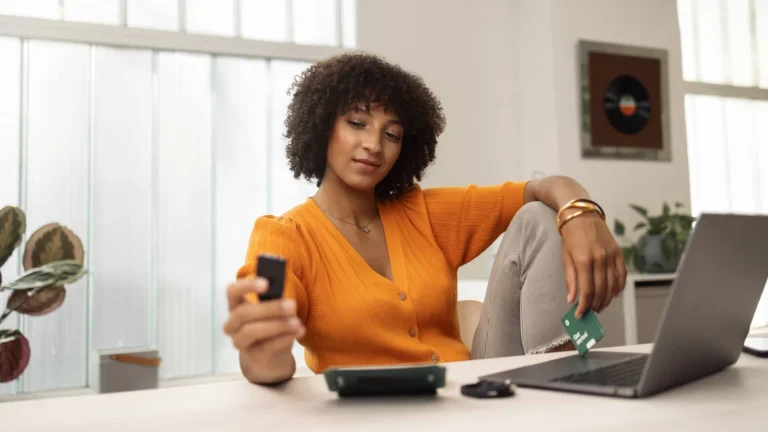

An air-gapped wallet is one that never touches your phone or laptop directly. No cable, no Bluetooth, no WiFi, no NFC. The Keystone 3 Pro moves everything the slow way, as QR codes on a screen and back through a camera, which leaves malware on your computer with nothing to talk to.
You’ll get from sealed box to funded wallet here. Set aside half an hour, and keep the device, a phone or computer with a camera, and a pen in front of you. Keystone charges $149 at the time of writing (September 2026).
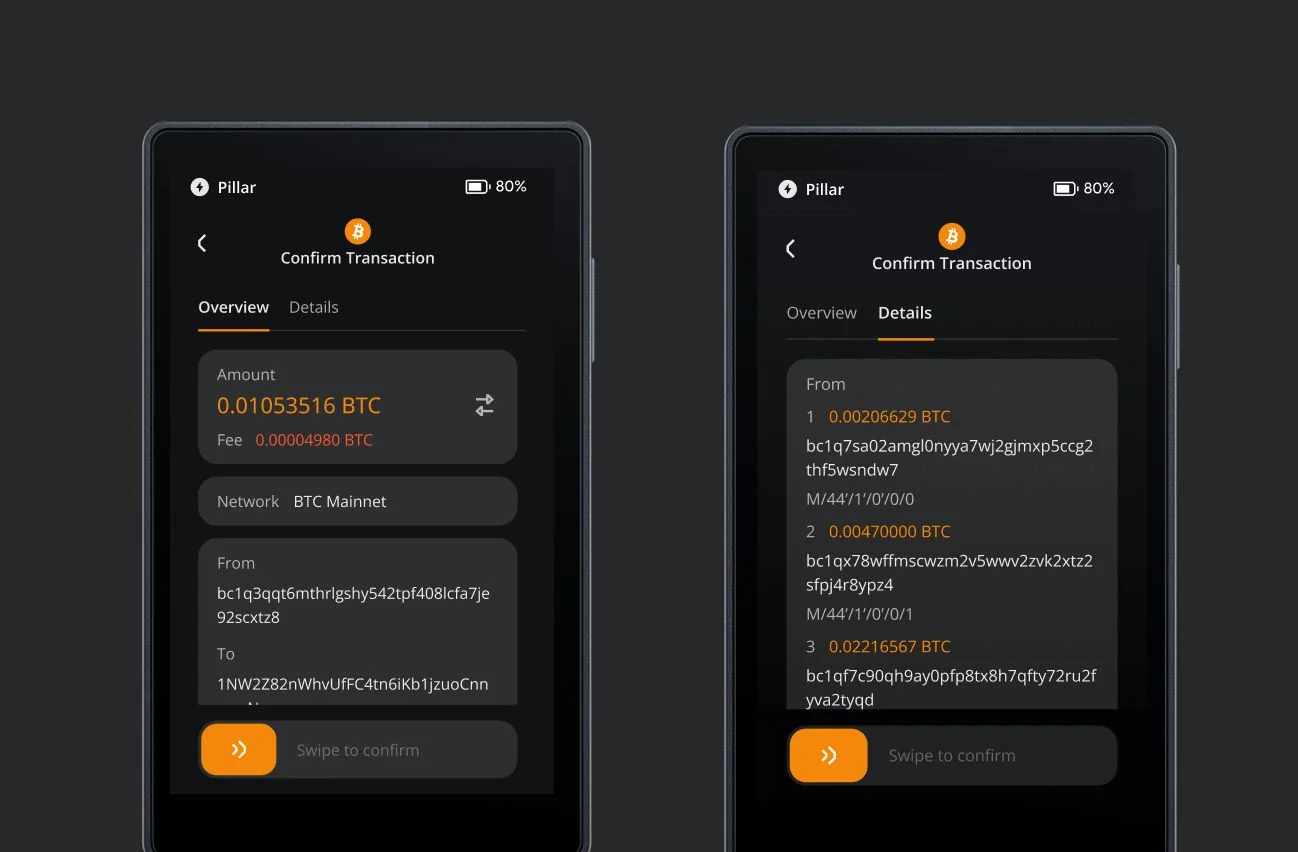
Table of contents
What to Have Ready Before You Open the Box
Round these up first. Nothing kills momentum like digging around for a cable at step three.
- Get the Keystone 3 Pro from the official store or an authorized reseller, because a device that has passed through a stranger’s hands can come back tampered with.
- You’ll want the USB-C to USB-C cable that ships in the box, plus a 5V/1A or 5V/2A charger. Keystone tells you to steer clear of fast chargers.
- Any phone or computer with a working camera will do, since every connection here happens by QR code.
- Grab a pen. Six seed phrase sheets are already sitting in the box.
- If you’d rather update firmware from a card, you’ll need a microSD formatted to FAT32. None comes in the box, and Keystone points to the KIOXIA microSDXC 64GB card, model KCA-MC064GS.
- Have a software wallet ready. Keystone Nexus, MetaMask, OKX Wallet, BlueWallet, Rabby and Safe all pair with it.
- Find a room with no cameras in it and nobody looking over your shoulder.
Before you touch anything, here is the one rule with no undo button. Crypto transfers don’t reverse: put in the wrong address or choose the wrong network, and that money is gone. Nobody at any support desk can pull it back for you.
Not committed to this device yet? Our Keystone 3 Pro review digs into what the hardware gets right and where it doesn’t, and our roundup of the best air-gapped crypto wallets sets it beside the rivals.
How to Set Up the Keystone 3 Pro, One Step at a Time
Keystone’s own walkthrough lives at keyst.one/get-started, and what follows tracks it. We’ve kept the wording you’ll actually see on the 4-inch display, quotes and all.
Step 1: Give It a Charge and Choose Your Language
Connect the supplied USB-C cable to a charger. There’s a 1000 mAh battery in there, and firmware updates refuse to run below 40%, so let it drink for a while before you carry on.
Hold the power button down until the display wakes. Language comes first.
Step 2: Check the Device Against Keystone’s Site
A screen headed “Verify Your Device” appears, with a “Skip” button sitting right there in the corner. Ignore it. In Keystone’s own words, this check “helps detect potential tampering during transportation, prevents supply chain attacks, and ensures that the installed firmware is safe and trustworthy.”
Pull up keyst.one/authentication on your phone or laptop. Hit “Scan QR Code” on the Keystone and aim its camera at the code on the page. An eight-character “Verification Code” then shows on the device, you type that into the site, and the site answers “Success” or “Failed”.
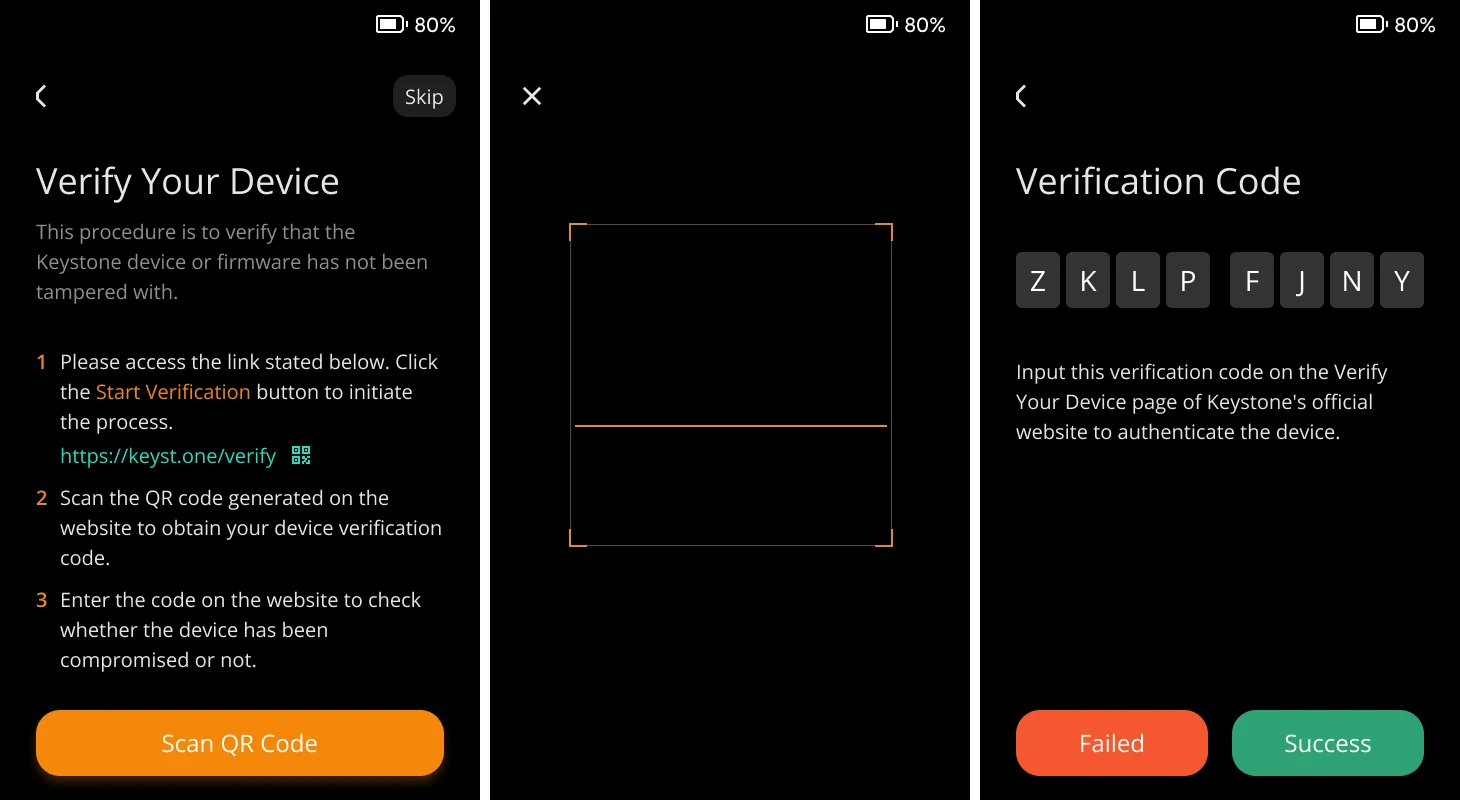
Failed? Don’t load a single coin onto it. Talk to Keystone first.
Step 3: Get the Firmware Current
Version 3.0.4 landed on 2026-08-12, and that’s the one you want. Keystone ships three builds, and they’re genuinely different: Multi-Coin for the usual spread of chains, Bitcoin-Only if you’d rather have less code running on a device that holds your savings, and Cypherpunk for BTC, ZEC and XMR.
Going the microSD route? Format the card FAT32, drop a file called exactly “keystone3.bin” into the root directory, and push the card into the slot on the left. Then it’s the “…” icon, “Device Settings”, “About”, “Firmware Update”, “Via MicroSD Card”.
Over USB, load keyst.one/firmware in Chrome. On the Keystone, walk through “…” , “Device Settings”, “System Settings”, “About”, “Firmware Update”, “via USB”, and tap “Approve” when it asks about USB access. One catch: that path only works if firmware 1.0.4 or newer is already installed, so a box-fresh unit may have to go by card once.
Each build gets a SHA256 checksum published next to it. Match that against your download before flashing anything, because a swapped firmware file is the one attack an air gap can’t help with.
Step 4: Pick a PIN, or a Full Password
Two buttons wait on the “New Wallet” screen: “Create Wallet” and “Import Wallet”. On a fresh device, take “Create Wallet”.
“Set a PIN Code” comes next, and it says plainly that “This PIN code will be used to unlock your wallet and sign transactions.” Six slots show up on the entry screen.
Tap the “Use Password” switch underneath and the keypad turns into a full keyboard, so letters and symbols are on the table too. Then “Repeat the PIN Code” appears.
Leave out birthdays, house numbers, anything a stranger could dig up about you. This code is the only thing standing between someone who has picked up your device and the wallet inside it.
Step 5: Make the Wallet and Copy Down Your Words
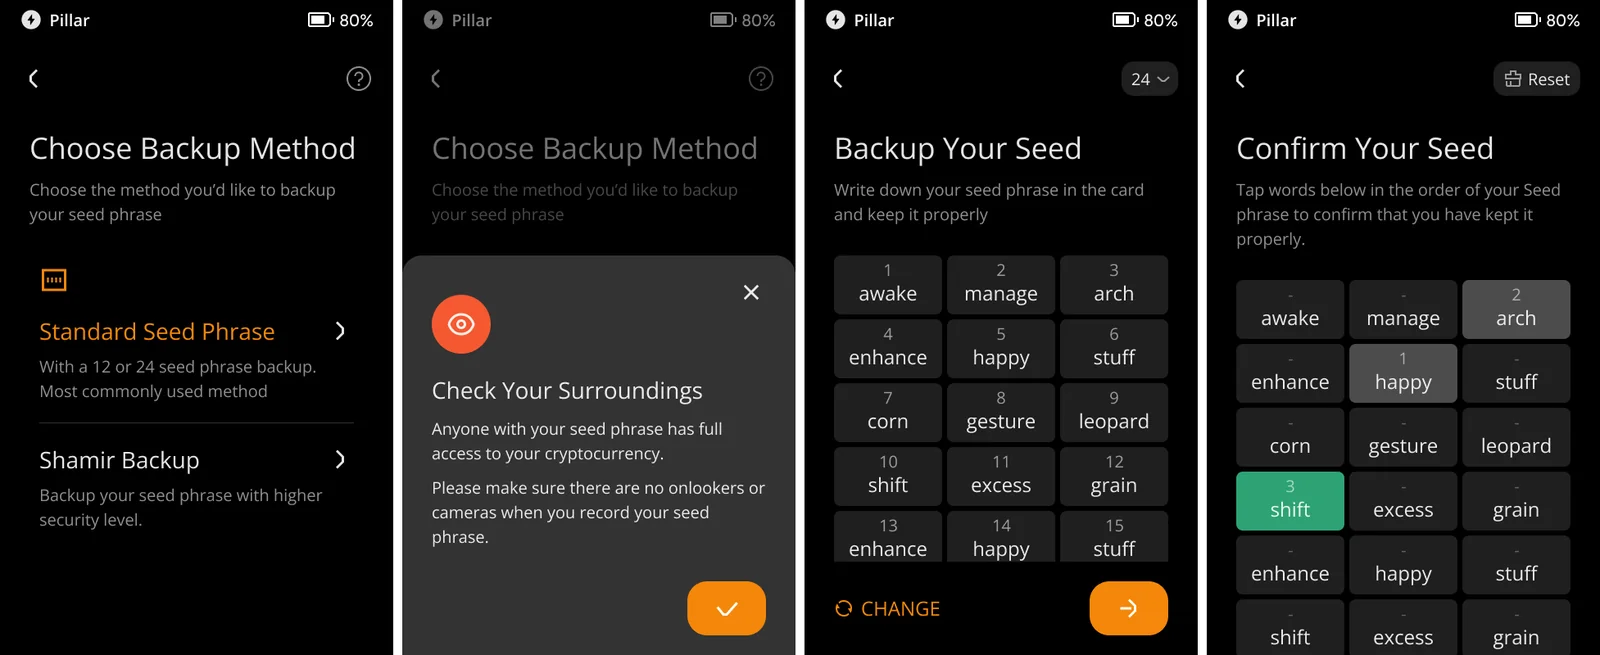
“Choose Backup Method” hands you two routes. The screen describes “Standard Seed Phrase” as a 12 or 24 word backup, and flags it as the method most people pick. “Shamir Backup” cuts the secret into shares instead, so in a 2-of-3 arrangement any two of the three cards can rebuild the wallet.
Your seed phrase is simply the list of words that recreates this wallet on any compatible device. Right before those words appear, a “Check Your Surroundings” prompt goes up, and it doesn’t hedge: “Anyone with your seed phrase has full access to your cryptocurrency.”
The words land on a “Backup Your Seed” screen telling you to “Write down your seed phrase in the card and keep it properly”. Use the sheets that came in the box.
Pen, not pencil. Number every word, then read your handwriting back twice.
Step 6: Prove You Wrote the Words Down
Now “Confirm Your Seed” wants you to “Tap words below in the order of your Seed phrase to confirm that you have kept it properly.” Lost your place? “Reset” clears the attempt so you can start again.
While it builds the keys, the display reads “Creating Wallet, Keep Screen ON” and then “Writing Secure Element…”. Don’t touch it until that’s finished.
Those words are your wallet. Whoever reads them can spend the coins, thief included, and no passcode on the device changes that fact.
Step 7: Teach It Your Fingerprint
Head into the “…” icon, then “Device Settings”, “Wallet Settings”, “Fingerprints & Password”, “Fingerprint Settings”. It asks for your password before letting you anywhere near this. Up to 3 prints fit, and each can be switched on for “Device Unlock”, “Transaction Signing”, or both.
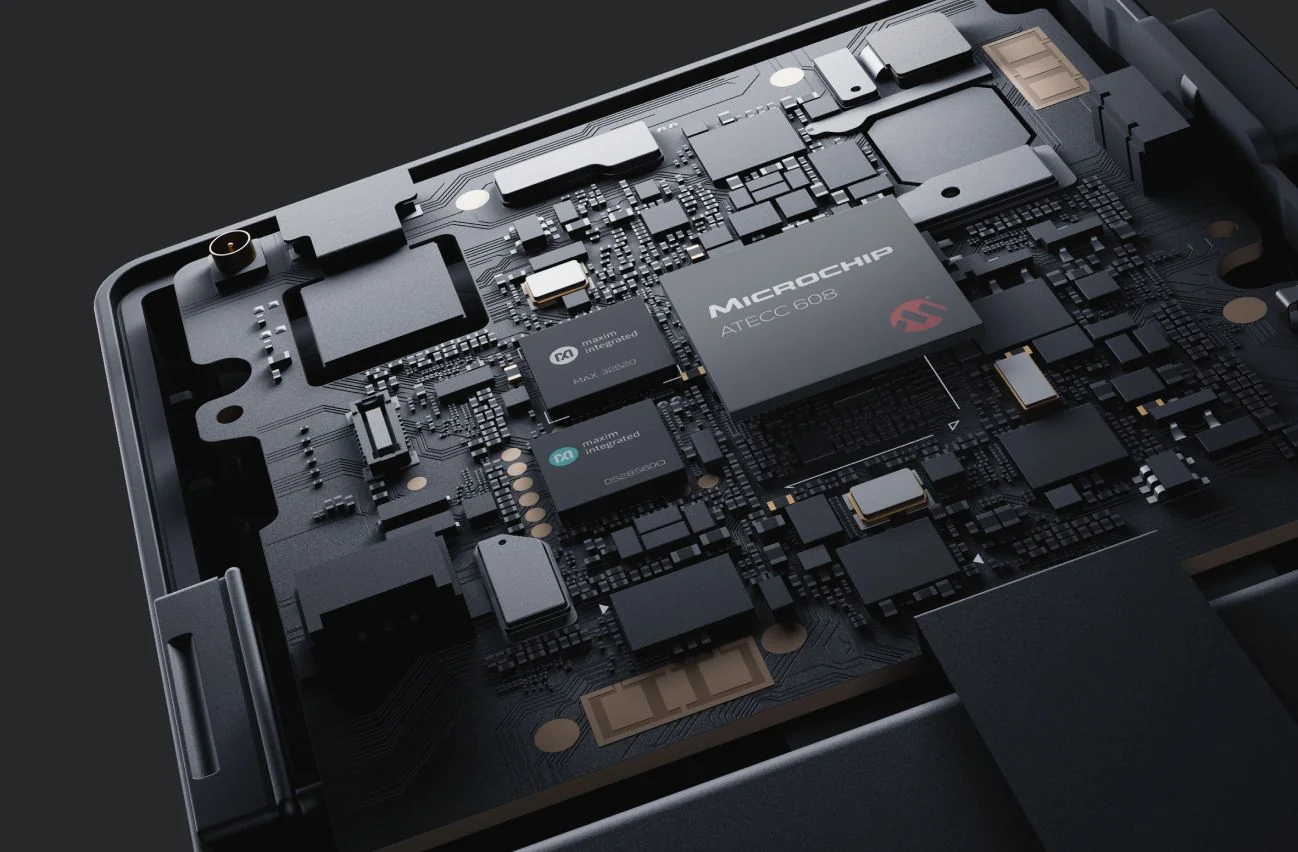
Prints live on a chip of their own, the Maxim MAX32520, one of three secure elements tucked inside the case. A secure element is a tamper-resistant chip that keeps secrets the rest of the hardware can’t read. Keystone quotes a 0.5-second unlock, and that speed is what decides whether you bother checking a balance at all.
Step 8: Pair It With an App
Because the Keystone 3 Pro never goes online, it can’t show you a balance by itself. That job belongs to an app with a connection. Keystone counts 45+ compatible software wallets, and its documentation covers OKX Wallet, MetaMask, BlueWallet, Rabby, BlockWallet and Safe.
Tap “…” on the main page, choose “Connect Software Wallet”, and pick your app. A QR code fills the screen. Open the app, find its scanner, point it at the code.
What that QR code carries is an extended public key, never your private keys, and there’s no way to work backwards from it. So the app watches your balances and can’t spend a thing. Keystone Nexus, the official companion app, costs nothing on iOS and Android and wants firmware 2.0.2 or newer.
Plenty of people buy this device purely to sit behind MetaMask. Our list of the best hardware wallets for MetaMask shows how the competition handles the same job.
Step 9: Start With a Tiny Test Transfer
Choose the coin in your software wallet, copy the receiving address, and send over a small amount. Keystone would rather you scanned the QR code than typed anything, which kills off a whole family of typos.
New to all of this? Our explainer on what a wallet address is covers the format.
Sending it back out brings up a “Confirm Transaction” screen, with “Overview” and “Details” tabs laying out the amount, the fee, the network and both addresses. Read those on the Keystone, not on your phone. Then drag the “Swipe to confirm” slider.
Six Keystone 3 Pro Settings We’d Change Right Away
| Setting | Where it lives | Why we’d touch it |
|---|---|---|
| Data transfer with USB | “…” > Device Settings > Connection | Switch it off and the USB port only charges. |
| Passphrase | “…” > Device Settings > Wallet Settings > Passphrase | This hides a second wallet behind your words. It runs to 128 characters and the device keeps no copy. |
| Seed Phrase Check | “…” > Device Settings > Wallet Settings > Seed Phrase Check | Proves your handwritten copy really opens the wallet, and nothing goes online. |
| BTC address type | Main page > BTC > Address Settings | Native SegWit addresses begin with bc1 and cost the least in fees. |
| Add Wallet | “…” > Device Settings > Wallet Settings > + Add Wallet | Room for 3 seed phrases on one device. |
| Firmware checksum | Device Settings > About > Device info > Firmware Version | “Show Checksum” lets you match the build against the published source. |
One extra, for anyone who doesn’t quite trust a chip to roll dice on their behalf. You can hand the wallet your own entropy: 50 rolls at minimum, 99 if you want the full 256 bits, on firmware 1.2.6 or later.
So How Long Does This Take?
Charging eats the most time, since these ship partly full rather than topped off. Verification is a two-minute job. The firmware update adds a few minutes more and reboots itself at the end.
Where people really slow down is the 24 words and the confirmation screen. Give it 10 minutes and don’t hurry. Pairing an app is one scan.
From then on the network sets the pace, not the wallet. Bitcoin moves when Bitcoin moves.
When Setup Goes Sideways, and How to Fix It
- Nothing happens with the microSD update. Confirm the card is FAT32, the file is named exactly “keystone3.bin”, and it sits in the root folder rather than buried in a subfolder.
- The USB update won’t run. Check that the USB connection switch is on, update Chrome, and make sure the device already carries version 1.0.4 or newer.
- Your balance reads zero. That’s the air gap doing its job, and the figure only turns up once a connected software wallet syncs.
- Coins left but never arrived. Look the transaction up on a block explorer, double-check the receiving address, then make sure your software wallet is watching the right account.
- The passcode has gone out of your head. Follow Device Settings, Wallet Settings, Fingerprint & Passcode, Reset Passcode, Forgot Passcode, and prove the seed phrase to set a fresh one.
- Assets disappear after you restore somewhere else. Brands use different derivation paths, the rules that turn a seed phrase into addresses, so your coins may be sitting where the other wallet never looks.
- You want a clean slate. Device Settings, System Settings, Wipe Device, and keep at least 20% battery in it.
Habits That Keep Your Keystone 3 Pro Safe
- Send a token amount first, watch it land, and only then move the rest across.
- Read the address off the Keystone screen every single time, never off your browser. Address-swapping malware lives on computers, and an air-gapped display is the one screen it cannot reach.
- Address poisoning is worth knowing about. Someone sends you dust from a lookalike address, hoping you’ll copy it out of your history weeks later.
- Don’t photograph your seed phrase, don’t type it into a computer, and keep it out of your password manager.
- A phrase that has already sat on an internet-connected device shouldn’t be imported here. Keystone says the same thing about MetaMask phrases.
- Store the passphrase somewhere other than the seed phrase. Nothing on the device remembers it, so lose it and that wallet is gone.
- Buy from Keystone or an authorized reseller, and run the verification check before any funds go near it.
Switching over from something else? Our walkthrough for setting up a Ledger Nano X covers the same ground on that device, and Keystone’s documentation says a Ledger phrase imports fine, with Bitcoin paths that match and Ethereum ones that work.
Your Keystone 3 Pro Setup Questions
Do I need a microSD card for the Keystone 3 Pro?
Only if you update firmware by card. None comes in the box. USB updating works instead once the device runs firmware 1.0.4 or newer, and if you do want a card, Keystone points at the KIOXIA microSDXC 64GB, model KCA-MC064GS.
How long does setting up a Keystone 3 Pro take?
Roughly half an hour, and most of that is you writing the seed phrase out and tapping it back in. If the device turns up nearly flat, add charging time, because firmware updates want 40% before they will start.
Can the Keystone 3 Pro work without a software wallet?
No. It never goes online, so it cannot fetch a balance or push a transaction out to the network. Keystone Nexus is the free official app on iOS and Android, and 45+ other wallets pair with it too.
What if I lose my Keystone 3 Pro?
Your seed phrase rebuilds the wallet on any BIP39-compatible device. Watch the derivation path, though. Keystone notes that brands differ there, and a mismatch can leave assets invisible.
Is the Keystone 3 Pro really open source?
Yes. The firmware sits at github.com/KeystoneHQ/keystone3-firmware, and the device will print its own build checksum so you can hold it against the public code.
How many wallets fit on a Keystone 3 Pro?
Three at a time, added under Device Settings, Wallet Settings, + Add Wallet. A passphrase wallet then layers on top of any of them, and the device keeps no record of that passphrase.
PIN or password on the Keystone 3 Pro?
Whichever suits you. The device takes a plain numeric PIN or a password mixing numbers, letters and symbols, and the Use Password control on the passcode screen flips between the two.
The Short Version
Most of setting up a Keystone 3 Pro is patience rather than skill. Charge it, run the verification against Keystone’s site, update the firmware, choose a passcode, then write those words down as though they were the only copy, because they are.
Pair an app, push a test amount through, and check the address on the device before every send. An air gap is only worth having if you read what the screen tells you.
This article is for general information only and is not financial, legal, or investment advice. Prices and features change; check the vendor’s official page before buying.